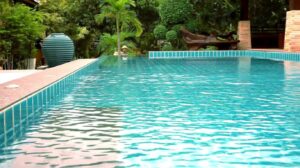
Adding an inground swimming pool Zionsville to your property is more than a luxury—it’s a lifestyle upgrade. Whether you’re looking to increase your home’s value, create a backyard oasis for family fun, or simply enjoy the benefits of outdoor relaxation and exercise, pool building and installation is a major project that requires thoughtful planning and the right team.
This 800-word guide walks you through the essential stages of pool building and installation, including planning, design, excavation, construction, and finishing touches. By understanding each step, you’ll be better prepared to work with a professional pool builder and bring your dream pool to life.
1. Planning Your Pool Project
Every successful pool installation begins with a well-thought-out plan. Start by defining your goals:
- How will you use the pool? (Recreation, exercise, relaxation, entertaining)
- Who will use it? (Children, adults, elderly, pets)
- What features are important? (Spas, waterfalls, tanning ledges, lighting)
Once you’ve determined your objectives, assess your available space. Consider sun exposure, shade, existing trees, and how the pool will integrate with patios, decks, and landscaping. Also, check local building codes, zoning regulations, and homeowners association (HOA) rules.
Budgeting is also key. Inground pools can range from $35,000 to over $100,000 depending on size, materials, features, and customization.
2. Choosing the Right Type of Pool
There are three main types of inground pools:
Concrete (Gunite or Shotcrete) Pools
- Highly customizable in shape, size, and finish
- Extremely durable and long-lasting
- Can incorporate advanced features like grottos, infinity edges, and built-in spas
- Higher cost and longer installation time (8–12 weeks)
Fiberglass Pools
- Pre-manufactured shells delivered in one piece
- Fast installation (2–4 weeks)
- Smooth surface that resists algae
- Limited shapes and sizes
Vinyl Liner Pools
- Customizable shapes with a steel or polymer frame and a vinyl liner
- Lower initial cost
- Liners typically need to be replaced every 7–10 years
- Mid-range in terms of installation time and customization
Your pool builder can help you determine which type best suits your space, budget, and maintenance preferences.
3. Pool Design and Layout
Once you’ve chosen your pool type, it’s time to finalize the design. Key elements include:
- Shape: Rectangular, kidney-shaped, freeform, or custom
- Depth: Shallow lounging areas, deep ends for diving, or uniform depth
- Features: Waterfalls, jets, slides, spas, swim-up bars, automation systems
- Decking and coping: Concrete, pavers, natural stone, or wood
- Lighting: LED lights, color-changing effects, or underwater fixtures
A pool contractor will create a scaled blueprint of your design and prepare it for permitting and approval.
4. Excavation and Construction
After design and permitting are complete, the construction process begins:
Step 1: Excavation
The pool site is marked and excavated to the shape and depth specified in the plans. Heavy machinery is used to dig out the area, and the soil is removed or relocated.
Step 2: Structural Work
- Concrete pools: Steel rebar is installed to reinforce the shape before the gunite or shotcrete is sprayed and cured.
- Fiberglass pools: The pre-formed shell is delivered and lowered into place using a crane, then leveled.
- Vinyl pools: The pool walls are assembled, the floor is smoothed, and the liner is installed once plumbing is complete.
Step 3: Plumbing and Electrical
Pipes are installed to connect the pool to the pump, filtration, and heating systems. Electrical work includes lighting and powering the pool equipment. Inspections may be required before proceeding.
5. Backfilling, Coping, and Decking
Once the structure is complete and plumbing is in place:
- Backfilling is done around the pool walls to stabilize the structure.
- Coping (the material that borders the top edge of the pool) is installed to provide a clean finish and transition to decking.
- Decking is added around the pool for lounging, walking, and outdoor furniture. Materials include stamped concrete, pavers, or natural stone.
6. Interior Finish and Filling
For concrete pools, the interior is finished with plaster, tile, or pebble surfaces. Once the finish is applied and cured, the pool is filled with water. Fiberglass and vinyl pools don’t require an interior finish and can be filled as soon as structural work is done.
At this point, your pool builder will balance the water chemistry and test the equipment to ensure everything is functioning correctly.
7. Landscaping and Final Touches
Now that the pool is ready, it’s time to beautify the surrounding area:
- Add plants, grass, trees, and hardscaping features
- Install fencing or barriers to meet safety codes
- Set up furniture, umbrellas, or an outdoor kitchen
Many homeowners choose to complete this stage gradually, depending on budget and long-term backyard goals.
8. Final Inspection and Handover
Before you can officially use your pool, a final inspection by the local building department ensures everything meets safety and building codes. Once approved, the pool builder will provide an orientation on equipment operation, water maintenance, and cleaning procedures.
Conclusion
Building and installing an inground pool is a significant project that requires planning, expertise, and attention to detail. By choosing the right pool type, working with an experienced contractor, and understanding each step of the process, you can ensure a smooth and successful installation.
The result? A beautiful, functional, and lasting addition to your home that will provide enjoyment, relaxation, and increased property value for years to come.


